You have a VPS, an ASN, and a prefix you are ready to announce. Now you need to turn those pieces into a working BGP session.
Open VPS Control, then open BGP Sessions. The first half of this guide follows that page in the same order you will see it. The second half moves to your VPS, where you will install BIRD 2 and check that the session is genuinely carrying routes.
By the end, you should see Established beside every router serving your VPS address, your prefix under Accepted, and your ASN at the end of the path in a public looking glass.
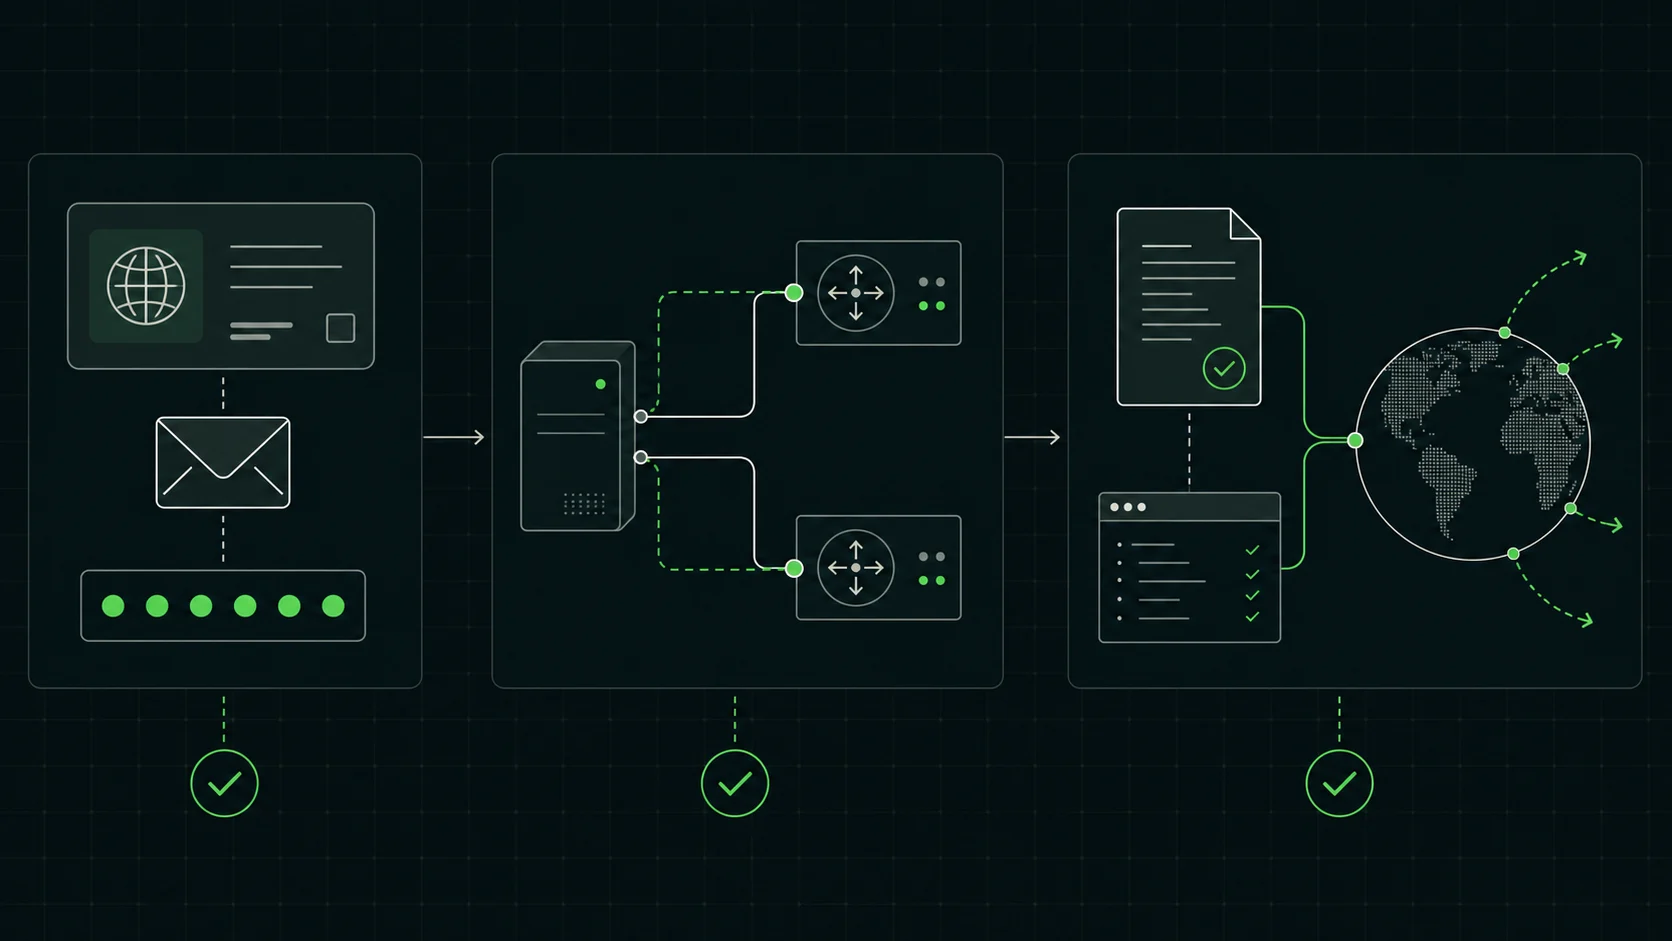
The three checkpoints are separate: ownership verified, sessions established, and prefixes accepted.
Have these ready first
- An active GetVPS service with at least one assigned public IP.
- A public ASN that you control.
- Access to one of the contact mailboxes published for that ASN in RIR WHOIS.
- The IPv4 and IPv6 prefixes you plan to originate.
- Matching IRR route objects and RPKI ROAs for those prefixes and your ASN.
If the IRR or RPKI part is not ready, stop here and follow RPKI and IRR authorisation. A route can establish perfectly and still be filtered because the origin is not authorised.
One practical warning: as soon as your announcement propagates, real traffic can move toward this VPS. Use a maintenance window for a production prefix and know how you will withdraw it.
1. Verify your ASN in My ASNs
At the top of BGP Sessions, you will see My ASNs.
- Select Add ASN.
- Enter the ASN as digits, for example
64500. - Select Lookup Contacts.
- Check the organisation name and choose a contact email.
- Select Send Code.
The add panel closes and a new pending row appears. Check the selected mailbox for a six-digit code, enter it in that row, then select Verify.
The code lasts for one hour. If it expires, use Resend in the same row. Once the code is accepted, the badge changes from pending to verified, and the ASN becomes available when you set up a session.
The email choices come from the ASN's public RIR WHOIS record. If the address you need is missing, update that record before trying again. If VPS Control asks for manual verification, open the support ticket it links to rather than repeating the lookup.
2. Set up the session on your VPS address
Scroll to BGP Peers. VPS Control groups the available addresses under each active service and shows how many are already configured.
An unused address has an unassigned badge and a Setup Session action. Select it. The Add BGP Session window opens with the service and peer IP already filled in.
You only need to choose two things:
| Choice | What it means |
|---|---|
| ASN | The verified ASN that BIRD will use as its local ASN. |
| Route mode | What GetVPS sends to you. It does not change which prefixes you are allowed to announce. |
For Route mode, choose:
- Default routes if you only need
0.0.0.0/0or::/0. This is the lighter and simpler choice. - Full table if you need every route for that address family and the VPS has enough memory for it.
Some locations offer default routes only. When that applies, VPS Control selects Default routes, disables the full-table option, and tells you why. There is nothing extra to configure.
Select Add Session. The address now has its own peer card. It may say checking, down, or show a non-established BGP state until you configure BIRD on the VPS. That is expected.
If the VPS is dual stack, repeat Setup Session for its IPv4 and IPv6 addresses. They are separate sessions, even when they belong to the same service.
Need a higher prefix limit?
Create the session first, then select Edit on its address. The edit window shows the current Max prefixes (IPv4) and Max prefixes (IPv6) values.
Select Request higher prefix limit, enter a higher value for IPv4, IPv6, or both, add a short reason if useful, then select Submit request. Leave a family blank when you want to keep its current limit.
The request is for this session only. While it is being reviewed, the link changes to Request pending - update request. Opening it again updates the same pending request. Your existing limit remains in force until the request is approved, and VPS Control emails you after the review.
3. Generate the configuration from VPS Control
Back in the BGP Peers header, select Config examples. The generator walks you through three short steps:
- Choose the service, or choose All services.
- Tick the sessions you want in the file and choose BIRD 2.x.
- Select Generate config, then Copy or Download.
Use the generated file as your starting point. It already knows:
- your selected service address and verified ASN;
- the correct GetVPS peer addresses and remote
AS52025; - whether the edge has one router or a redundant pair;
- whether a peer needs
multihop; and - whether each session receives a default route or a full table.
Do not copy neighbour addresses from a tutorial or another VPS. Keep every generated BGP protocol block unless the network team tells you otherwise. Two blocks for one address normally mean that your edge has two route collectors.
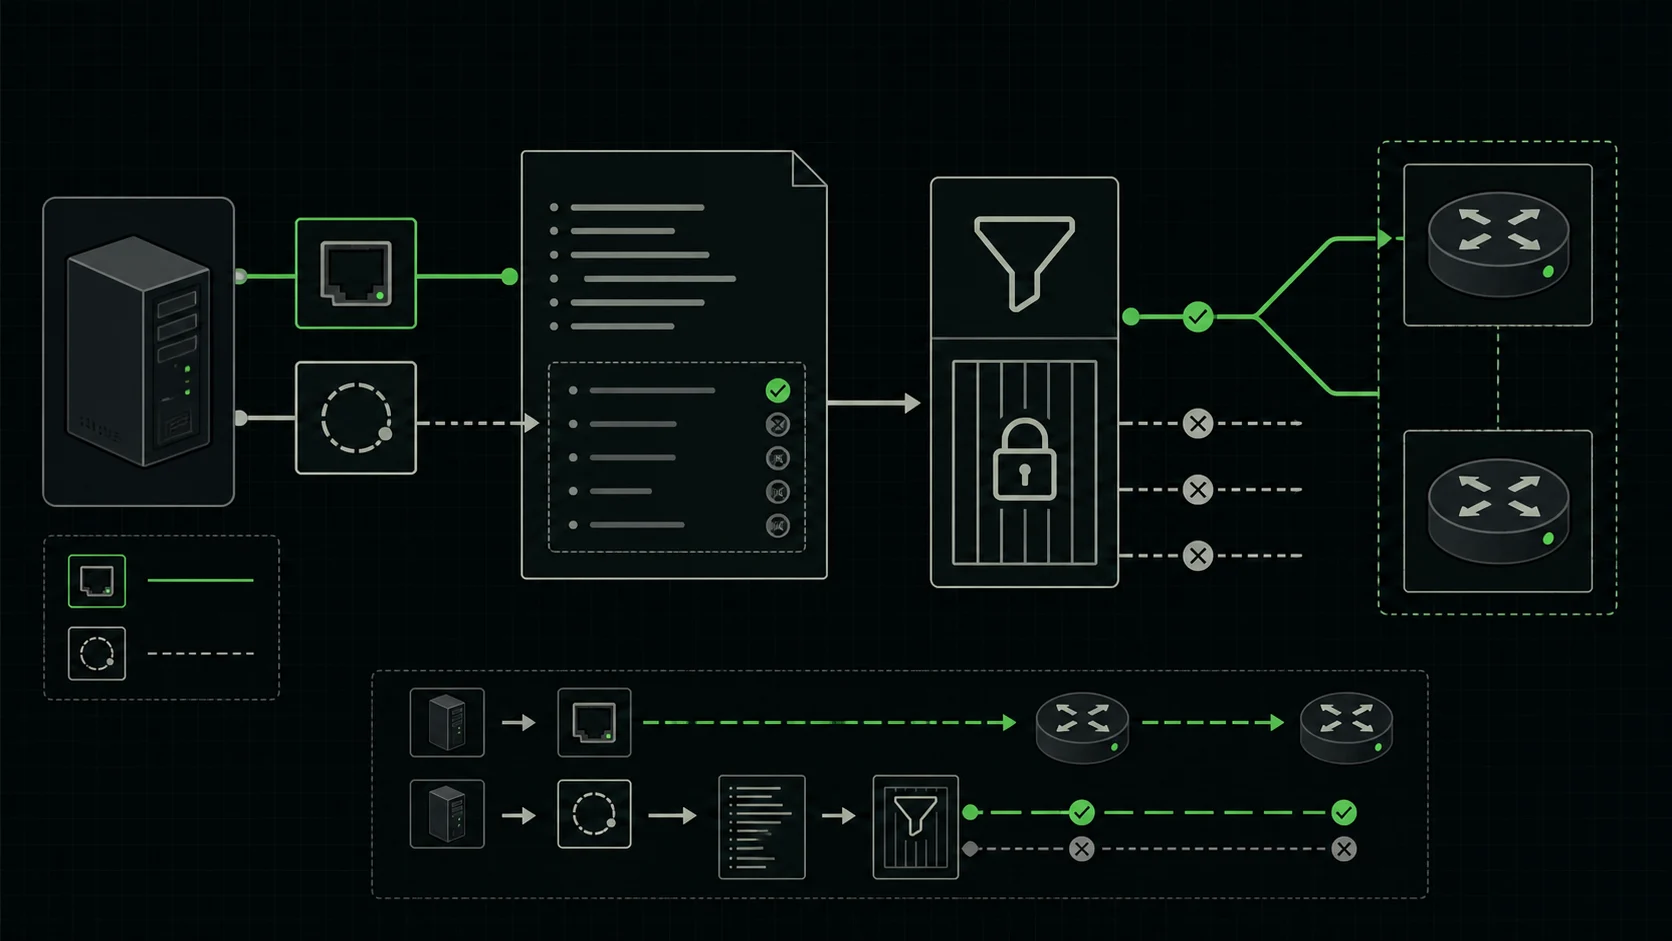
Your service IP forms the session. Your export filter decides which owned prefixes may pass through it.
4. Check the local address, then add an address from your prefix
On the VPS, first confirm that the generated local address is really configured:
ip -br link
ip -br addr
The local ... as ... address in each generated BGP block should be the public address already assigned to the VPS. If it is missing, stop and fix the service's network assignment. Do not invent a source address or add an address copied from this article.
The prefixes you announce have a different job. They attract traffic to the VPS, so Linux also needs a local address inside each prefix for your services to use. For example:
sudo ip addr add 203.0.113.1/32 dev lo
sudo ip addr add 2001:db8:100::1/128 dev lo
Those are documentation addresses. Replace them with addresses from prefixes you own. The commands last until reboot, which is useful for the first test. Once routing works, persist the addresses with your distribution's network configuration.
On Ubuntu with Netplan, a persistent example looks like this:
network:
  version: 2
  renderer: networkd
  ethernets:
    lo:
      addresses:
        - 127.0.0.1/8
        - ::1/128
        - 203.0.113.1/32
        - 2001:db8:100::1/128
Save it as /etc/netplan/60-bgp-loopback.yaml, then validate it while the VPS console is open:
sudo chmod 600 /etc/netplan/60-bgp-loopback.yaml
sudo netplan generate
sudo netplan try
ip -br addr show dev lo
netplan try gives you a rollback window if the complete network configuration breaks connectivity.
5. Install BIRD 2 and replace every EDIT marker
On Ubuntu or Debian:
sudo apt update
sudo apt install -y bird2
sudo cp -a /etc/bird/bird.conf /etc/bird/bird.conf.bak
Paste the generated example into /etc/bird/bird.conf, then search the file for EDIT.
For each address family, replace the example prefix in both places:
- the static route that originates the prefix inside BIRD; and
- the export filter that allows that prefix toward
AS52025.
For an owned IPv4 /24 and IPv6 /48, those sections would look like this:
protocol static paradox_static_ipv4 {
    ipv4;
    route 203.0.113.0/24 blackhole;
}

protocol static paradox_static_ipv6 {
    ipv6;
    route 2001:db8:100::/48 blackhole;
}

filter paradox_export_ipv4 {
    if source != RTS_STATIC then reject;
    if net !~ [ 203.0.113.0/24 ] then reject;
    accept;
}

filter paradox_export_ipv6 {
    if source != RTS_STATIC then reject;
    if net !~ [ 2001:db8:100::/48 ] then reject;
    accept;
}
If you announce several prefixes, add all of them to the static protocol and the matching filter allowlist. Keep the generated local, neighbor, import policy, and multihop lines unchanged.
The two filter checks are an important safety boundary. BIRD will export only a static route that also appears in your explicit allowlist. Do not replace that with export all.
6. Validate and start BIRD
Ask BIRD to parse the file before you touch the running service:
sudo bird -p -c /etc/bird/bird.conf
No output and exit status 0 means the syntax passed. If a firewall is active, allow TCP port 179 from only the peer addresses in the generated file.
Now start BIRD and load the configuration:
sudo systemctl enable --now bird
sudo birdc configure
sudo birdc show status
sudo birdc show protocols
The generated protocol names begin with paradox_ and end with _ipv4 or _ipv6. A redundant edge normally has two protocol rows for one service address. Give them a moment to move through Connect and OpenSent to Established.
If BIRD does not start, the quickest clues are here:
sudo systemctl status bird --no-pager
sudo journalctl -u bird --since '15 minutes ago'
7. Return to BGP Peers and read the result
Go back to BGP Sessions and select Refresh.
At the top of BGP Peers, the summary shows the number of sessions, how many are established, how many are down, and when the data was last refreshed. Each address card then gives you a closer view:
Established (2/2)means both routers serving that address are up.directormultihopdescribes how the peer is reached. The generated config has already handled this.default onlyorfull tableconfirms the route mode in force.- Each router row shows its peer address, BGP state, and route counters.
The counters are from the GetVPS side of the session:
| Counter | What you should read it as |
|---|---|
| Accepted | Prefixes you sent that the router accepted. |
| Rejected | Prefixes you sent that the router filtered. |
| Sent | Routes that GetVPS is sending to your BIRD session. |
For a first single-prefix announcement, you want Accepted to show 1 on every established router and Rejected to stay at 0.
Select Routes on the address card to see the individual accepted and filtered routes. You can search by prefix, AS path, or router. Select a route row for details such as next hop, RPKI state, communities, and a filter reason when the collector provides one.
Also confirm from BIRD that the intended route is actually being exported. Substitute the protocol names generated for your location:
sudo birdc show route protocol paradox_static_ipv4
sudo birdc show route protocol paradox_static_ipv6
sudo birdc show route export paradox_london_rc1_ipv4
sudo birdc show route export paradox_london_rc2_ipv4
Seeing a route in paradox_static_ipv4 is not enough by itself. show route export proves that it passed your outbound filter for that specific peer.
8. Check the route from outside
Give the announcement a few minutes, then search for your prefix in a public looking glass or route collector.
You are looking for three things:
- your ASN is the origin at the end of the AS path;
AS52025is directly upstream of it on the expected path; and- route-origin validation reports
Valid.
Finally, test an address from your prefix from a machine outside the GetVPS network:
ping 203.0.113.1
ping -6 2001:db8:100::1
A ping from the VPS to itself only proves that the address exists locally. An outside test proves that traffic can follow the announcement back to the server.
If it does not come up
| What you see | What to check first |
|---|---|
ASN stays pending | Enter the emailed code in the pending row. Use Resend if the one-hour window passed. |
| Setup Session has no ASN to select | Make sure the ASN badge says verified, not pending or suspended. |
| Config examples lists no sessions | Make sure you added the session, selected the correct service, and ticked at least one active address. |
BIRD stays in Idle | Confirm the generated protocol is enabled and the validated file was loaded. |
BIRD stays in Active | Check that the generated local address exists, the peer is reachable, and TCP 179 is allowed. |
OpenSent or OpenConfirm does not clear | Recheck the local and remote ASNs, then inspect the BIRD journal. |
Session is Established, but no route is exported | Search for a missed EDIT. Check the static route and the matching export allowlist. |
Rejected is above 0 | Open Routes, inspect the filtered prefix and reason, then check its prefix length, origin ASN, IRR object, RPKI ROA, and current session limit. |
| Route is visible, but the service is unreachable | Make sure the service address is on lo and the host firewall allows the application traffic. |
Useful local checks:
sudo journalctl -u bird --since '15 minutes ago'
sudo ss -tnp | grep ':179'
ip -br addr
How to back out safely
To withdraw your prefixes without deleting the configuration, disable every generated BGP protocol. For example:
sudo birdc disable paradox_london_rc1_ipv4
sudo birdc disable paradox_london_rc2_ipv4
Use your real generated names, including the IPv6 protocols. Confirm that show route export is empty, then watch a public route collector until the announcement disappears.
Once the routes have withdrawn, you can select Remove on the matching address in BGP Peers. VPS Control names the peer IP, family, and ASN in the confirmation because removing it immediately drops that router peer.
To restore the previous BIRD file:
sudo cp -a /etc/bird/bird.conf.bak /etc/bird/bird.conf
sudo bird -p -c /etc/bird/bird.conf
sudo birdc configure
Your final check
- The ASN badge says
verified. - Every IPv4 and IPv6 address you intend to use has a session.
- The route mode is the one you expect.
- No
EDITmarkers remain in the generated file. - Every generated BGP protocol is
Established. show route exportlists only prefixes you own.- Every router shows the expected Accepted count and no unexplained rejects.
- IRR and RPKI both authorise the same prefix and origin ASN.
- An outside test reaches an address on the VPS.
- You know which BIRD protocols to disable if you need to withdraw quickly.
That is the complete path: verify the ASN, attach it to a VPS address, let VPS Control generate the real peer configuration, replace the example prefixes, and keep checking until the portal and the public routing table tell the same story.